Quick answer: What Is a Stem in Music Production? Definition, Uses & How to Export
undefined undefined undefined.
Quick Answer
A stem is a stereo audio bounce of a grouped set of tracks — for example, all drum elements mixed to one file, all synths to another. Stems sit between a full stereo mix and raw individual tracks, giving engineers and collaborators meaningful control without drowning them in hundreds of separate files.
What Is a Stem?
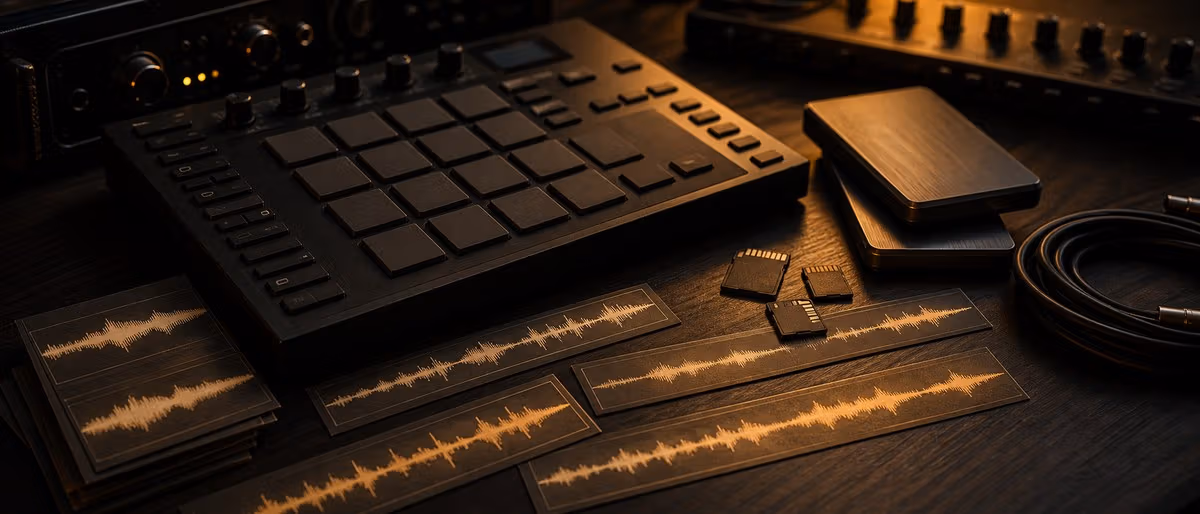
In music production, a stem is a stereo (or mono) bounce of a logical group of tracks processed together. Where a full mix collapses everything to two channels, and a multitrack gives you every individual clip, stems land in between: a project of 60 channels might be reduced to six stems — Drums, Bass, Keys, Lead Synth, FX, and Vocals — each containing the submix with all its insert effects printed.
The word comes from the idea of branches stemming off a trunk: the finished track is the trunk, each grouped submix is a branch. Engineers, mastering houses, remix artists, and live performers have worked with stems since at least the early days of multi-stem film audio, long before digital audio workstations made the format routine.
A stem always starts at bar 1, beat 1 — even if the element it contains doesn't appear until bar 32. This ensures that when multiple stems are loaded into a new session they snap to a common timeline with zero drift.
Stem vs Multitrack vs Sample vs Loop: The Key Differences
These four terms are routinely confused. The table below is the clearest disambiguation — commit it to memory and you'll never use the wrong word in a session.
| Format | What it contains | Mix state | Typical count per song | Primary use |
|---|---|---|---|---|
| Stem | Group of related tracks bounced together (e.g. all drums) | Partially mixed — inserts applied, no master bus | 4–8 per song | Mixing, mastering, remixing, live performance, licensing |
| Multitrack / individual track | One single instrument or layer (one kick, one bass line) | Dry or lightly processed — fully editable | 20–80+ per song | Full editing, re-mixing from scratch, sound replacement |
| Sample | A short recorded snippet reused in a new context | Already processed, self-contained | Varies (library) | Beat-making, sound design, interpolation |
| Loop | A seamlessly repeating audio clip, usually 1–8 bars | Already processed, tempo-locked | Varies (library) | Arrangement building, layering |
| One-shot | A single hit or event (kick, snare, stab) | Already processed, fixed length | Varies (library) | Drum programming, layering, resampling |
The critical distinction between a stem and a multitrack is the number of files and the mix state. A stem is a decision already baked in — the drum bus EQ, parallel compression, and saturation are all printed. A multitrack is an invitation to re-engineer everything from scratch. Stems are faster to work with; multitracks offer more control.
Samples, loops, and one-shots come from libraries — they are a separate concept entirely and are source material for building new music, not deliverables of a finished session.
Why Stems Are Used: Six Real-World Scenarios
- Mixing A mix engineer receives stems instead of the full session when the artist uses a different DAW or plugin set. The engineer can still balance drums against bass and vocals without needing every individual channel. Stems also reduce session complexity — a 200-track project becomes 8 manageable files.
- Mastering A mastering engineer working from a stereo two-bus has limited options. Stems mastering — processing Drums, Bass, and Top separately before recombining — allows targeted dynamics control and spectral correction that is impossible on a summed mix. See how to master a track for a deeper walkthrough.
- Remixing Remix packs distributed to DJs and producers are almost always stems (not full multitracks) because they contain enough elements to rebuild an arrangement while protecting proprietary session details. A typical official remix pack: Drums, Percussion, Bass, Synths, Vocals.
- Live performance Electronic artists playing live load stems into Ableton, Traktor, or a hardware controller rather than triggering a stereo backing track. This allows real-time muting and mixing — dropping the drums on a breakdown, pushing the bass for impact — without needing a full session open.
- Beat licensing (trackout stems) When an artist buys a trackout or stems lease from a beat marketplace, they receive the beat as individual stems rather than a single mixed WAV. This lets their vocal engineer adjust the low-mids on the 808, duck the hi-hats where the vocals sit, or remove an element that clashes. A trackout lease is typically the highest non-exclusive tier on platforms like BeatStars, sitting above a basic WAV lease.
- AI stem separation Modern AI tools can separate a stereo mix into approximate stems — vocals, drums, bass, other — without the original session. Tools in this category include open-source models such as Demucs (Meta Research) and commercial apps that use similar architecture. Results are imperfect but useful for practice remixes, sample flips, and resampling workflows.
How to Export Stems From Your DAW
The workflow is similar across all major DAWs: group tracks into logical buses, bounce each bus, label consistently, and deliver from bar 1. Below are the steps for the two most common DAWs in bedroom production.
Ableton Live
- Group and name your tracks
Route related channels to a Group Track (e.g., all drum clips to a "Drums" group). Give every group a clear name — Ableton uses it as the exported filename. - Select all groups in Arrangement View
Work from Arrangement View for deterministic exports. Select all the Group Tracks you want to bounce. - Open Export Audio/Video
Press Cmd+Shift+R (Mac) or Ctrl+Shift+R (Windows) to open the export dialog.[1] - Set Render Start to bar 1
Even if a group starts at bar 32, render from bar 1. Every stem must share the same start point so they line up perfectly when imported elsewhere. - Choose format and bit depth
Select WAV, 24-bit (or 32-bit float for maximum headroom), at the project's native sample rate. Disable Normalize and Render as Loop. - Export and label
Click Export. Ableton outputs one file per selected track. Rename with a consistent prefix: 01_Drums.wav, 02_Bass.wav, etc.
FL Studio
- Route instruments to named Mixer tracks
Each instrument channel in the Channel Rack must be routed to a dedicated Mixer track. Name the Mixer tracks clearly — the name becomes the exported filename. - Open File > Export > WAV file
Navigate to File > Export > WAV file and choose a destination folder (create a "Stems" subfolder). - Enable Split Mixer Tracks
In the Rendering dialog, check Split Mixer Tracks. FL Studio will render each Mixer track as a separate file. Also check Enable Insert Effects so channel FX are printed. - Set bit depth and disable master effects
Use 24-bit WAV. Leave Enable Master Effects unchecked so limiter/clipper on the Master bus does not squash individual stems. - Click Start
FL Studio renders all Mixer tracks to separate WAV files. Set the Playlist end marker 1–2 seconds past the last event to capture reverb and delay tails.
Universal conventions regardless of DAW: all stems at the same sample rate, same bit depth, same total length (bar 1 to end), no master bus loudness maximizer applied to individual stems, and a reference stereo mix included alongside the stem folder for level checking.
Stem File Formats and Conventions
The industry convention for stems is WAV, 24-bit, at the session's native sample rate (44.1 kHz or 48 kHz are both common; 48 kHz is standard for video work). AIFF is equally acceptable on macOS-centric workflows. MP3 stems are never used professionally — lossy encoding defeats the purpose of pre-mixing control.
There is also one formal, named stem container format worth knowing: Native Instruments STEMS, introduced in 2015.[2] The NI STEMS format uses a .stem.mp4 file extension — an MP4 container carrying up to four AAC-encoded audio streams (e.g. Drums, Bass, Melody, Vocals) plus a full stereo master, all in a single file. It was designed for DJs using Traktor to mix and mute individual elements in real time. Note that this format is distinct from the general production use of the word "stems" — NI STEMS is a specific DJ-focused container, not a standard used in mixing or mastering workflows.
For general mixing and mastering delivery, there is no single file container. Stems are simply a labeled folder of WAV files accompanied by a text document noting BPM, key, sample rate, and any notes for the receiving engineer.
Stems and Beat Licensing: Trackout Leases Explained
In the beat marketplace world, "trackouts" and "stems" are used interchangeably. When a producer offers a trackout lease, they deliver the beat as a set of individual stem files — typically one WAV per instrument group — rather than a single mixed file.
On platforms like BeatStars, the license tier hierarchy generally runs: MP3 lease (lowest) → WAV lease → Trackout/Stems lease → Exclusive. The trackout tier is the premium non-exclusive option because it hands the buyer's engineer full control over the mix balance.[3]
From a licensing perspective, a trackout lease is still non-exclusive — the producer can sell the same beat to other artists. The stems are a delivery format, not a rights transfer. Exclusive rights are a separate purchase and are typically far more expensive. For a full breakdown of how music licenses work in context, see how to license music for film, games, and ads.
Stem Delivery Checklist
- Start point Every stem file begins at bar 1, beat 1 — no trimming to the first event.
- End point All stems end at the same timestamp, with reverb and delay tails fully captured (add 2–4 seconds of silence after the last transient).
- Format WAV, 24-bit minimum. Match the session sample rate exactly (44.1 or 48 kHz). Do not convert or resample.
- No master processing Bypass the master bus limiter, clipper, and loudness maximizer before bouncing. Stems should have at least 3–6 dB of headroom.
- Consistent naming Prefix with a number:
01_Kick.wav,02_Snare.wav,03_HiHats.wav,04_Bass.wav,05_Synths.wav,06_Vocals.wav. Numbered prefixes sort correctly in every file manager. - Reference mix Always include a full stereo reference mix (
00_MIX_REFERENCE.wav) in the same folder so the receiving engineer knows what the intended balance sounds like. - Readme Add a plain text file: BPM, key, sample rate, tuning reference (A=440 Hz), and any FX notes (e.g. "Vocals stem includes pre-fader send to reverb return — no dry reverb on this stem").
Stems in Your Mixing Workflow
Understanding stems makes you a better collaborator regardless of where you sit in the production chain. As a beatmaker, exporting trackouts is a direct upgrade path for your clients — it removes the ceiling on what a mix engineer can do with your instrumental. As an artist, requesting stems (instead of just a WAV) from your producer gives your engineer room to make the vocal sit properly rather than fight a pre-locked mix.
The fundamentals of mixing apply at the stem level too: gain staging, headroom, frequency separation. The stems you send to a mastering engineer are the last editable layer before the final master — treat them with the same care you would a mix bus.
If you are new to the concept of mixing levels and gain structure, reviewing mixing fundamentals before your first stem export session will save you from common mistakes like clipping stems or sending files with wildly inconsistent levels.
Browse free tutorials on mixing, mastering, and stem workflows — all in one place.
Browse Free DownloadsLearning path
Related answer hubs
Catalog materials
Production materials to try next
Relevant packs, stems and sound resources from the catalog so readers can move from the guide into production immediately.
![DECAP Knock Audio Drums That Knock 11 [WAV]](/images/posts/decap-knock-audio-drums-that-knock-11-83936-326w.avif?v=20260630)
![Basic Wavez Deep Progressive House Essentials Vol.1 [WAV]](/images/posts/basic-wavez-deep-progressive-house-essentials-vol1-83984-326w.avif?v=20260630)
![Al Amin 33s Drumkit [WAV]](/images/posts/al-amin-33s-drumkit-83990-326w.avif?v=20260630)
![Bones N Grit Audio Emo Bands [WAV]](/images/posts/bones-n-grit-audio-emo-bands-84010-326w.avif?v=20260630)
article.relatedTitle
![Singing Success 360 The Complete Method (SS360) [TUTORiAL]](/images/posts/singing-success-360-the-complete-method-ss360-84348-326w.avif?v=20260630)
Singing Success 360 The Complete Method (SS360) [TUTORiAL]
![Udemy Pop and RnB Music Production with Ableton Live 12 [TUTORiAL]](/images/posts/udemy-pop-and-rnb-music-production-with-ableton-live-12-84361-326w.avif?v=20260630)
Udemy Pop and RnB Music Production with Ableton Live 12 [TUTORiAL]
![On Point Samples The Industrial Rawstyle Kick System [WAV, Synth Presets, TUTORiAL, DAW Templates]](/images/posts/on-point-samples-the-industrial-rawstyle-kick-system-84280-326w.avif?v=20260630)
On Point Samples The Industrial Rawstyle Kick System [WAV, Synth Presets, TUTORiAL, DAW Templates]
![FaderPro The One Hour Mixing Workflow [TUTORiAL]](/images/posts/faderpro-the-one-hour-mixing-workflow-84119-326w.avif?v=20260630)
![Udemy Learn Piano The Easy Way A Beginner's Guide [TUTORiAL]](/images/posts/udemy-learn-piano-the-easy-way-a-beginners-guide-84213-326w.avif?v=20260630)
Udemy Learn Piano The Easy Way A Beginner's Guide [TUTORiAL]
![Truefire Polyrhythm and Advanced Rhythm Training (JamPlay) [TUTORiAL]](/images/posts/truefire-polyrhythm-and-advanced-rhythm-training-jamplay-84170-326w.avif?v=20260630)
Truefire Polyrhythm and Advanced Rhythm Training (JamPlay) [TUTORiAL]
Frequently Asked Questions
- What is the difference between a stem and a track?
- A <strong>track</strong> usually refers to a single instrument channel in your DAW — one kick, one bass line, one vocal take. A <strong>stem</strong> is a bounced stereo file of a <em>group</em> of related tracks already mixed together, such as all drums combined. Stems are fewer files, faster to work with, but offer less granular editing access than raw individual tracks.
- What is a trackout or stems lease on a beat marketplace?
- A trackout (or stems) lease is a beat license tier in which the producer delivers the instrumental as separate stem files — one file per instrument group — rather than a single mixed WAV. This gives the buyer's mix engineer full control over balancing the beat against the vocals. It is typically the premium non-exclusive tier on platforms like BeatStars, sitting above a standard WAV lease.<sup><a href="https://blog.beatstars.com/posts/buy-beats-guide" target="_blank" rel="noopener">[3]</a></sup>
- How do I make stems in FL Studio?
- Route every instrument in the Channel Rack to a named Mixer track. Then go to <strong>File > Export > WAV file</strong> and check <strong>Split Mixer Tracks</strong> in the Rendering dialog. FL Studio will output one WAV per Mixer track. Use 24-bit and leave master effects unchecked so your limiter does not process individual stems.
- What is the difference between a stem and a submix?
- In practice they mean the same thing in most contexts. A <strong>submix</strong> is a group bus while it is still live and adjustable inside your DAW session. A <strong>stem</strong> is that same group bus after it has been printed (bounced) to an audio file. The word "stem" implies a deliverable; "submix" implies an in-session routing.
- What file format should stems be in?
- Industry convention is <strong>WAV, 24-bit</strong>, at the session's native sample rate (44.1 kHz or 48 kHz). All stems in a set must share the same format, sample rate, and total length. Do not deliver stems as MP3 — lossy compression defeats the purpose of pre-mixed control. Note: Native Instruments' DJ-focused STEMS format uses <code>.stem.mp4</code>, which is a different, specialized container not used in standard mixing or mastering.<sup><a href="https://splice.com/blog/native-instruments-stems-format-how-it-works/" target="_blank" rel="noopener">[2]</a></sup>
- Do stems include effects and processing?
- Yes — by convention, stems include all insert (channel) effects and the group bus processing for that stem, but <strong>not</strong> the master bus limiter or loudness maximizer. The goal is to give the receiving engineer a pre-mixed group with internal balance and tonality already set, while preserving headroom on the output so they can still apply mastering-level processing.
- Can AI separate a stereo mix into stems?
- Yes, AI-based stem separation tools can extract approximate vocals, drums, bass, and other elements from a finished stereo mix. Tools like open-source Demucs (Meta Research) and commercial apps in this space produce usable results for practice remixes, sample flips, and creative resampling — though they cannot perfectly reconstruct elements that were mixed together. Quality degrades significantly on heavily compressed or distorted material.